
Add
1. One account
In the list of accounts, select Add Accounts. The Add Accounts window opens.
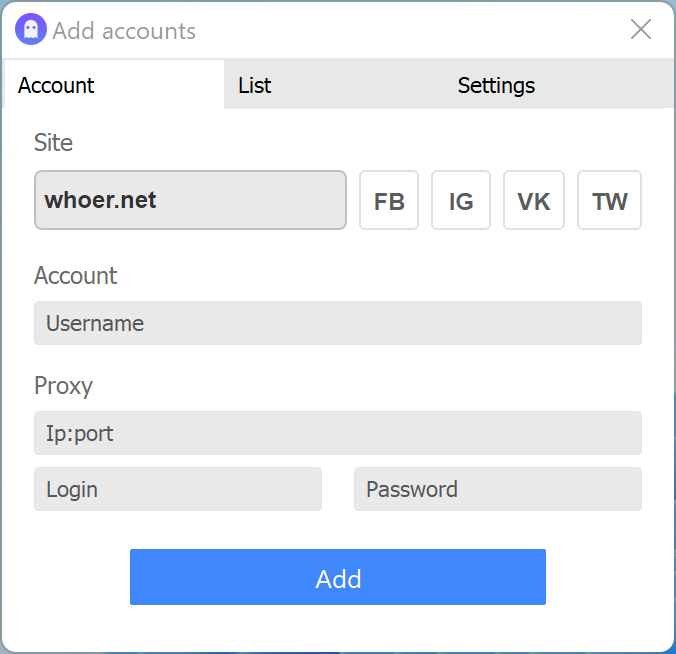
Select a site from the list (VK - vk.com, FB - facebook.com, etc.) or press OTHER to enter any other site address.
If you choose a social network from the list, you can account in the format login:password, then the program will automatically authorize this account. Learn more at in the Authorization section.
Also in the Account field you can enter the name of the account which will be displayed in the list of accounts (you can change it later).
Next, enter a proxy in the format ip:port with login and password in proxy fields.
Click Add.
2. List of accounts
When logging in as a list in the Add Accounts window Select the Accounts list.
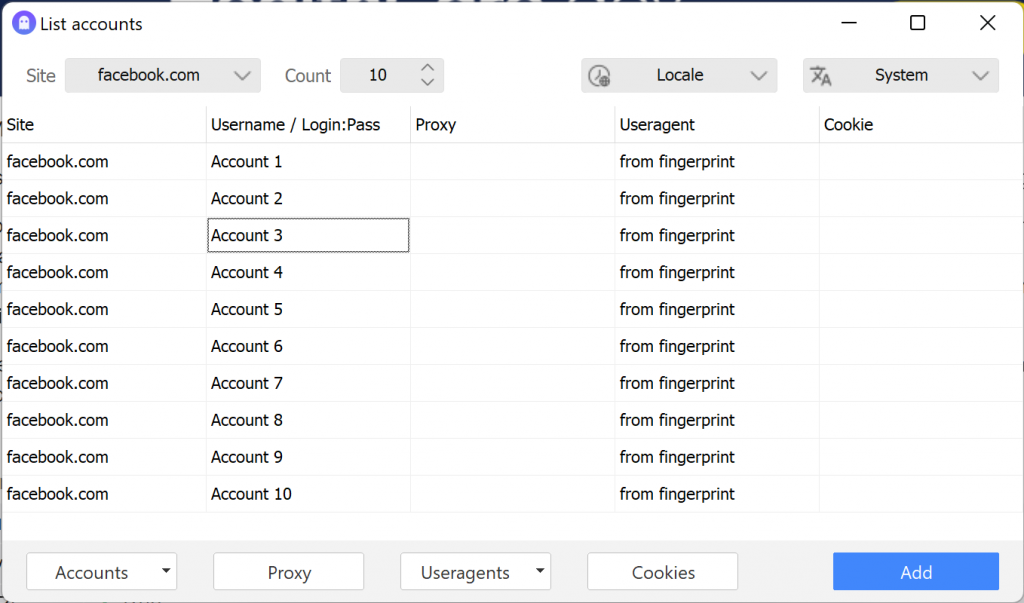
In the Site field, select a site from the list or enter the site manually.
Next, first load the accounts in the format login:password, and then proxies in ip:port:login:pass:useragent format. Each account will be assigned a proxy from list.
The table can also be edited manually. To add new entry in the Accounts field, press the key ⬇️.
After the accounts and proxies are entered, click Add.
When adding a list, each account is assigned a unique user agent in randomly from our database.
3. Settings
Next tab - Settings.
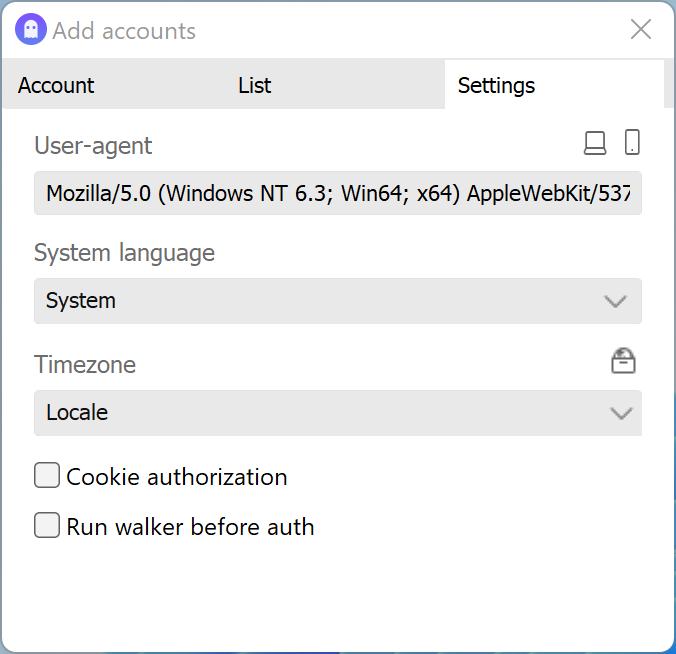
User agent
The user agent from this field is assigned only when adding 1 account.
The user agent is automatically taken from our database, each time Each time a new user agent is added, a new one is taken. If necessary, you can insert your own or change it with the using the buttons above the field (computer icon - desktop user agent, phone - mobile).
System language
A language that is read by sites as system language. That is That is, which is supposedly on the computer. Use the language of the accounts, if you have English-speaking accounts - then choose English, if others, then under the page of the account. You can choose from the list or enter your own.
Time Zoneс
The time that is read by the sites as set on your computer. Use a proxy in case their time zone is different from your computer's time zone. Otherwise, leave Local.
Walker
The function "Run walker before The"" function allows you to bypass the list of specified sites before adding an account. The option is useful When you need to "fatten cookies" for example in the case of Facebook. That is, for the site on which you enter, you will look not as the first login to the Internet, but as a user with a history.
4 . Cookie authorization
To authorize accounts with cookies, when adding select a site, specify a proxy, and set the settings. Do not enter the account username and password, if you have them. After opening the site page, go to account settings → Change cookies → Insert cookies and click Set button.
Cookie format:
- JSON
- name=value;
If the cookie is in netscape format, use our converter at https://accovod.com/cookieConverter/
Read more
 Auth
Auth